Hello
everybody!
One of my
favorite ways to personalize a room is by surrounding myself with artwork done
by myself or people I care about. The results may not be perfect, but they feel
infused by love.
Today, I want
to share the making of this painting with you. It is pretty easy to do and I
adore the fact that it incorporates books (I just plain love to read!).

The
silhouette shows two characters from my favorite Grimm´s fairytale, “Brüderchen
und Schwesterchen”
Cost *
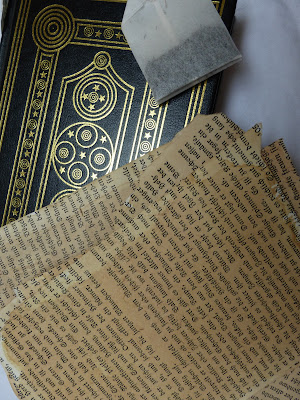
You need:
- Canvas,
whichever size you like
- An old
book (Fitting my theme, I chose one about the forest, and I love the antique
look of the font (Sütterlin)).
- teabags
(black tea)
- white
acrylic paint
- baking
parchment
- a
middle-size brush, glue and a cutter
2. Next you
need to darken the paper so it forms a better contrast to the white paint.
Swipe the teabags over the pages after dunking them (the teabags, not the
pages!) in hot water. I suggest you
wear gloves because the water is hot and your fingers will get all shrivelly,
dry and brown (I did NOT wear gloves). Once the pages are dry, repeat the
process until you feel the paper is dark enough. I did about 5 swipes.
3. Glue the
pages to the canvas in different angles. Let them overlap.
4. Chose a motif.
It must be something
that works well as a silhouette – perhaps your daughter`s head, your favorite
apple tree or your cat sitting on the window seat?
I found a
beautiful picture of a young deer online. For the girl I asked my cousin to
pose in a long dress. Print the picture and mark the outline with a pen. If you
have several pictures, copy them bigger or smaller until the sizes fit together.
I had to give shrinking the deer several tries.
5. Place
the baking parchment on top of your picture and trace the outline. Then,
carefully, cut out the template.
 6. Choose
the right spot for the motif and place the template on that part of the canvas.
Now comes the trickiest part. Carefully dab white paint on the motif´s edge
without shifting the parchment at all. Use enough paint to really cover up the darkened pages. Once you have finished the whole outline you can lift off your
template. Look how pretty it is!
7. The rest
of the picture you can paint pretty fast. As my canvas is pretty tall and my
motif only fills up a small part, I graduated the color, placing less paint
towards the upper end of the canvas to let the darkened pages shimmer through.
This way, there is some action going on up there as well and the picture looks
better balanced.
I really
like the simplicity of this picture, which in my eyes does not hinder but
rather showcases it´s beauty.
So choose
your motif and try out how good it can look as a simple silhoutte!
Linking to these awesome parties:


This is sooo pretty! Great job!
ReplyDeleteThank you so much!
ReplyDeleteA wonderful tutorial on how to create this lovely piece of art. I do love that the silhouette is made of book pages.
ReplyDeleteThank you! I love books around me, they make a home so comfy.
ReplyDeleteWhat a fabulous way to make a silhouette! I love the vintage paper and the white paint....
ReplyDelete:)
hugs x, Crystelle
Crystelle Boutique
Yana - that's really cool! I love that you used the actual book page for the silhouette! Love book page crafts! Julia
ReplyDeleteI'm a big fan of fairy tales. This is so cute! Thanks for inviting me over. :)
ReplyDelete